
How to Clean House Faster: 11 Steps From A Pro Hotel Housekeeper
Cleaning hotel guest rooms and the rest of a hotel’s property is much harder than cleaning a home. For one, the cleanliness and health standards of a hotel must be high to enable them to continue their industry standard hotel rating.Also, unlike cleaning a home, hotel housekeeping staff have time limits. A hotel room attendant for example is given only 20 to 30 minutes to spotlessly clean a guest room no matter how dirty it is.
I’ve worked as a hotel housekeeper during my student days and have learned fast and efficient cleaning techniques from the more senior housekeepers. Just like any activity, cleaning can be optimized such that you spend only a little time doing it without loss in quality.
Note: These cleaning knowledge have been acquired by doing actual cleaning work on an almost daily basis for years.
Summary:
Home Cleaning StatisticsThe Steps:
1. Prepare Cleaning Bucket, Tools and Supplies
2. Immerse Dirty Objects in Hot Water and Cleaning Liquid
3. Spray Grime Remover On All Grime
4. Remove Cloth Covers and Wash Them Using a Washing Machine
5. Dust And Wipe From Top to Bottom
6. Clear Clutter
7. Replace Cloth Covers
8. Vacuum and Mop Sequentially
9. Clean the Softened Dirt and Grime from Objects and Surfaces
10. Wash Rags and Cleaning Tools
11. Dry your Cloth Covers and Rags
Final Words
2022 Home Cleaning Statistics:

- 2 to 4 hours are spent cleaning a house each week
- Homes are deep cleaned 5 to 7 times/month and cleaned normally 5 to 7 times/month also
- Most people finish spring cleaning in 6 days, 29% finish in 6 days, 31% in 3 to 4 days
- The average person cleans 12,896 hours in their lifetime which is 1.5 years and 77 weeks
- 46% do their own cleaning while 30% of Gen Z relies on other people to do the cleaning
- Nearly 10% of all US households paid for professional cleaning services
- 20% of men have stated that they never clean their homes thoroughly
- 51% of women do housework daily
- Nearly 31% of couples argue about housework a minimum of once a week
- Everyone hates cleaning/sanitizing bathrooms
- Indoor level of pollutants are on average 5 to 100 times higher than outdoors
- House cleaning sales are almost $20 billion/year with projected growth of 20% a year
- Global home cleaning products market size was $163,981,000 in 2019 and projected to be $312,493,000 by 2027
- 25% prefer to do laundry, 21%-cleaning countertops, 21%-vacuuming, 17%-cleaning dishes
- 47% have never cleaned their oven, 41%-refrigerator, 23%-bed linens, 20%-washing machine, 16%-guest bathroom toilet
As you can see, home cleaning takes a lot of people’s time and everyone don’t like doing it or most of it.
Sources:
- Allied Marketing Research
- Cleaning Institute Survey
- Environmental Protection Agency (EPA)
- Lombardo Homes survey on 1,070 Americans ranging in age between 18 to 79
- Wakefield Research
Back To Summary List
The Steps:
1. Prepare Cleaning Bucket, Tools and Supplies
 1.1 Cleaning Bucket:
A cleaning bucket is not only essential to professional cleaners but to anyone who cleans. It organizes your cleaning tools and supplies and prevents cleaning liquid from spilling to the floor.
It prevents your dirty rags and cleaning tools from contaminating already clean areas in your home. It is very frustrating if you have to clean your home again because it was contaminated by your dirty rags and cleaning tools.
It also guarantees that your cleaning supplies and tools are within reach should you miss a spot in your cleaning.
1.2 Cleaning Tools: You should make it so that you are able to carry your cleaning bucket and tools with both hands. Having to go back to your cleaning tools because you cannot carry them while you’re carrying your cleaning bucket can waste a lot of time.
If you have a lot of cleaning tools, consider fitting them all in one bag or container. Your cleaning path should always be moving forward without having to go back and forth for cleaning tools left behind.
Bring as many rags and brushes as you can. These two tools are the first ones you would miss when you don’t have enough of them.
1.3 Cleaning Supplies: Make sure that all your cleaning liquids are in sufficient quantity especially your grime removal liquids. Disinfectants are also well used cleaning liquids. Don’t forget to bring a sufficiently full air freshener spray.
Back To Summary List
2. Immerse Dirty Objects in Hot Water and Cleaning Liquid
 There are dirt and grime that takes time to wore off even if you use plenty of cleaning and grime removal liquid. This cannot be helped.
Rather than waste your time trying to clean these hard to remove dirt and grime, why don’t you let nature do its work. Collect all the dirty objects you have and immerse then in hot water (even ordinary water would do) with a sprinkling of cleaning liquid.
Let them sit in water letting water and the cleaning liquids do their work for you. You can come back to them after you finish your other cleaning chores.
Back To Summary List
3. Spray Grime Remover On All Grime
 There would be hard to remove dirt and grime that would be stuck across many surfaces and appliances of your home like in the walls, windows, carpets, floors, tables, toilet, oven, stove and so on.
Spray grime remover on all of these grime infested surfaces, appliances and so on and again let the grime remover do its work by giving it time.
You can come back to these grime infested surfaces and appliances after you’ve finished your other cleaning chores.
Back To Summary List
4. Remove Cloth Covers and Wash Them Using a Washing Machine
 Remove your blankets, pillow covers and bed covers and wash them in the washing machine. While you wait for the washing machine to do its job, you can do your other cleaning chores.
This is like doing two things at the same time with a machine helping you.
Back To Summary List
5. Dust And Wipe From Top to Bottom
 You should begin dusting and wiping from the top area of your home to the bottom. For example, if you live in a two floor home, you should begin dusting and wiping from the top floor going down to the bottom.
For each floor and room, you should begin dusting and wiping from the ceiling all the way down to the bottom.
By starting from the top to the bottom, you let dirt you dust and wipe from the top to settle to the bottom ensuring that the top area you already cleaned remains clean. No need to repeat your dusting and wiping again.
Back To Summary List
6. Clear Clutter
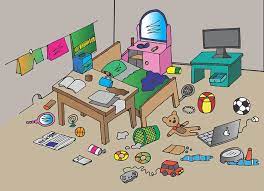 Many other online articles about cleaning your home fast usually advise that you do this first, however, the dirt and grime in the clutter you would be removing would only get transferred to a new location.
This is why it is best to dust and wipe clutter first before putting them in their right place. This ensures that the clutter and the place you are transferring them to, are already clean in the first place. There is no need to clean them both again.
Back To Summary List
7. Replace Cloth Covers
 You replace the cloth covers only after doing your dusting and wiping. This ensures that your uncovered bed, pillows and so on are already clean even before you put new covers on them.
If you had replaced your cloth covers before dusting, your clean cloth covers would be dirtied by dust. This is the reason why you do this only after dusting.
Back To Summary List
8. Vacuum and Mop Sequentially
 Vacuum using a sequence where you only go forward. Unplanned vacuuming wastes time by forcing you to go back and forth to the surfaces you already cleaned and haven’t cleaned.
Be careful with the word “forward only sequence”. It doesn’t mean vacuuming following a single line only. A better sequence would be to envision surfaces as plots of squares where you only stand in the middle of a square not moving while vacuuming the surface within the square.
This strategy not only saves time but also effort. You can do the same thing when you are doing mopping.
Back To Summary List
09. Clean the Softened Dirt and Grime from Objects and Surfaces
 By this time, all the surfaces in your home would have been dusted, wiped, vacuumed and mopped. By this time also, the hard to clean dirt and grime sticking in your home surfaces, objects and appliances would have softened already.
This is the perfect moment to clean them as they would be so easy to clean by this time. No need to spend a lot of time trying to clean hard to remove dirt and grime. The water and your cleaning liquids have done the job for you.
Back To Summary List
10. Wash Rags and Cleaning Tools
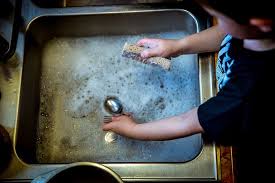 By this time also, your washing machine would have finished washing your dirty cloth covers. Remove them from the washing machine and this time wash your dirty rags using your washing machine.
As you wait for the washing machine to do its job, clean your cleaning tools and store them away.
Back To Summary List
11. Dry your Cloth Covers and Rags
 Lastly, dry your cloth covers and your rags. By this time, the surfaces you mopped, the surfaces, objects, and appliances you have cleaned would have been dry already.
It’s just time for the finishing touches like spraying air freshener in your entire home or putting fresh flowers in your vases.
Back To Summary List
Final Words
 Usually, the biggest time wasters when it comes to cleaning your home is removing hard to remove dirt and grime. Next comes waiting for the dishwasher to clean your dirty clothes.
Immersing hard to clean objects in hot water and cleaning liquid as well as waiting for the washing machine to clean you clothes while doing other cleaning chores saves you a lot of time.
Following a cleaning sequence and not total cleaning from room to room saves you more time. This is because you don’t have to change cleaning tools and supplies for every type of cleaning chore you do.
These are the secrets to clean any home or people dwelling fast. As you can see, the techniques are not rocket science but easily implementable techniques. Happy cleaning!
Back To Summary List
You Might Be Interested To Read This Article:

Road Trip Planning To Maximize Your Trip Enjoyment: 17 Things To Prepare
A road trip can be a very enjoyable and even life altering event. Many people want to go on road trips but don’t have the time and resources. But even if they do, they sometimes ruin or don’t fully enjoy their road trip because of inadequate planning and preparation.
Here is a comprehensive list of what you should plan or prepare to do before you embark on your road trip in order to enjoy the most of it. Remember, you’re usually exposing yourself to unfamiliar environments when you go on a road trip which can be uncomfortable
...